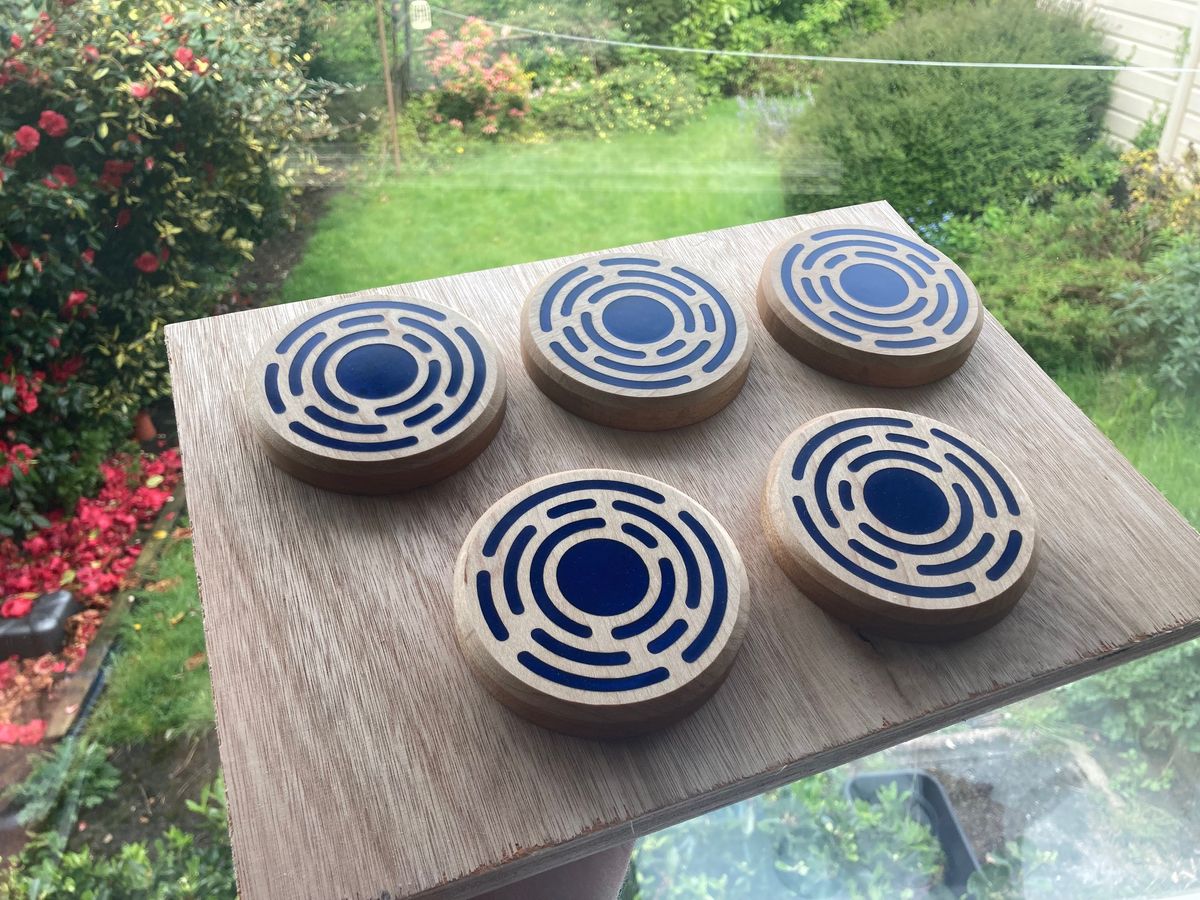
Geometric Epoxy Coasters

Wood and epoxy combine together to make household objects that are both beautiful and functional. And so, after scrolling through hundreds of epoxy drinks coasters on Instagram, I endeavoured to make my own.
I chose a circular geometric design that appealed to my inner artist and appeased my engineering mindset. On reflection, it also echoes the general style of the Star Wars universe, so maybe there was something subconscious going on there - who knows.
The first step was to model it up in CAD (using Fusion 360).

After ordering some eye-wateringly expensive maple wood from an online retailer, I set up my homemade CNC machine to attempt a first cut.

It went rather badly, which it turns out would be a theme for this project...
My CNC is homemade so its not very rigid, and it struggled doing the deep profiling cuts around the circumference of the coaster. Sometimes the workpiece would come loose in the last few minutes of the program and get mangled by the cutting tool, other times the double sided tape (holding the wood) would catch the cutting tool and ruin the part.
I quickly accumulated a graveyard of failed coasters, and with both my wallet and my ego taking a hit, decided to try a different method.

Rather than having the CNC cut out the circumference of the coasters, I decided to make finished-size circular blanks by hand, and then use my CNC just to carve the detailed pattern on the top surface. That way, it would never need to do the tricky profiling cut around the circumference.
I started off trying to make these circular blanks on my table saw, but that felt rather unsafe so I listened to the little voice in my head and stopped. Instead, I opted to use my newly-built router table which, although not the prettiest of tools, is very effective - using a car jack to lift and lower the cutting bit.

I didn't know how to make circles using a router table, but after finding a helpful YouTube video, I started making a jig that would slide on top of the table and use a pin pointing upwards for the wood to pivot around.

With everything set up, the last piece of the puzzle was how to keep my fingers safe, so I taped several different circles together to create a stack that would preserve a healthy distance between the router bit and my precious digits.
The piece I wanted to cut was on the bottom, and I rotated the whole stack from the top, moving the router bit up a little at a time to prevent large chips flaking away.

After a couple of initial failures, I got my eye in and made some good circles, but it was very easy to get it wrong and scrap the wood. Despite the effort in creating a jig, the router table was not the right answer either.

I decided to combine both methods together - creating slightly oversized circular blanks using a handheld jigsaw, and then letting my CNC remove the last few millimetres to achieve the finished dimensions.
I drilled a hole through the middle of the blanks and mounted them using a bolt that screwed into the threaded nuts in the CNC table. Using a small piece of scrap timber as a spacer lifted the coasters up just enough to give the cutting tool clearance for profiling the full depth of the wood.
Although the CNC still had to cut the profile around the circumference of the coaster, it had plenty of fresh air for chip evacuation, and there was no double sided tape to contend with. Using conservative feed rates, I was able to create a reliable process for machining the coasters, and churned out a batch of 5. Huzzah!

After a bit of clean up using sand paper, the coasters were taking shape!

Now the fun could really start, and I mixed up a batch of epoxy resin, using blue mica powder for a punch of colour.

After lots of sanding and polishing, I added a 45 degree chamfer on the edge of each coaster (using the router table) and applied a few coats of polyurethane varnish.

The final element was a cork bottom for each coaster, which I cut out with a Stanley knife, and sanded to achieve a rounded edge.

And there you have it - after a couple of wrong turns at the beginning, I think this project was a true success and I am very pleased with the finished result.

I'm sure I'll make more of these in the future, but for now I will keep one for myself and gift the remaining four to my parents as they have just moved house.